Ferrero Rocher Rich Chocolate Cake


IMG_0177

I. Love. YouTube.

More specifically, I love watching baking/cooking channels on YouTube. And I will openly admit that I watch waaaaay more videos of things being cooked than actually cooking said things.

BUT! There was one recipe I watched that I just had to try. And that recipe is Laura in the Kitchen’s “How to Make a Cake From Scratch” which is simply a rich chocolate cake recipe.

Laura’s recipe also includes instructions on how to make an accompanying peanut butter filling, a chocolate ganache and some extra toppings but I just used her recipe for the cake itself.

**Spoiler alert** – it turned out PERRRRRFECT!

It is the most incredibly rich, moist chocolate cake that I have ever tried and the recipe doesn’t even call for melted chocolate! Cocoa powder can freely take all the credit for the rich chocolately flavour in this little number.

If you’re looking for your next go-to chocolate cake recipe then seriously look no further. The only thing that I will mention is that instead of using plain flour, baking powder and baking soda which the recipe calls for, I omitted the baking powder and baking soda and replaced the plain flour with the same amount of self raising flour.

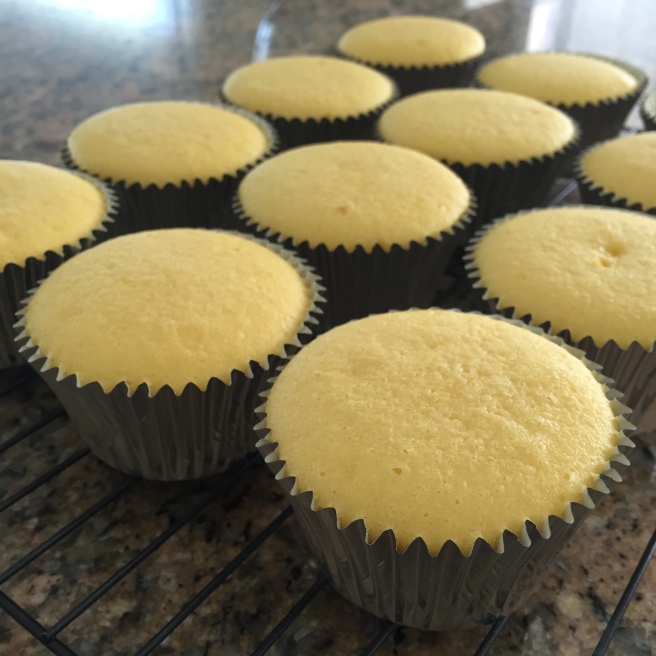
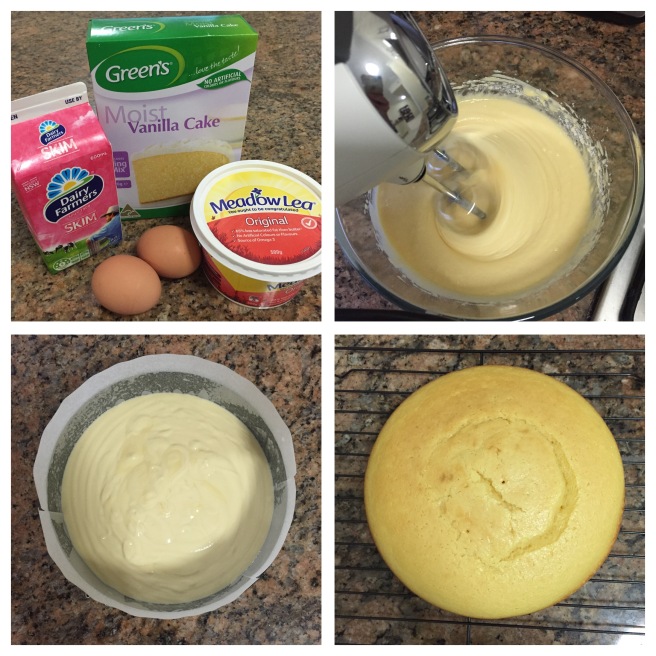
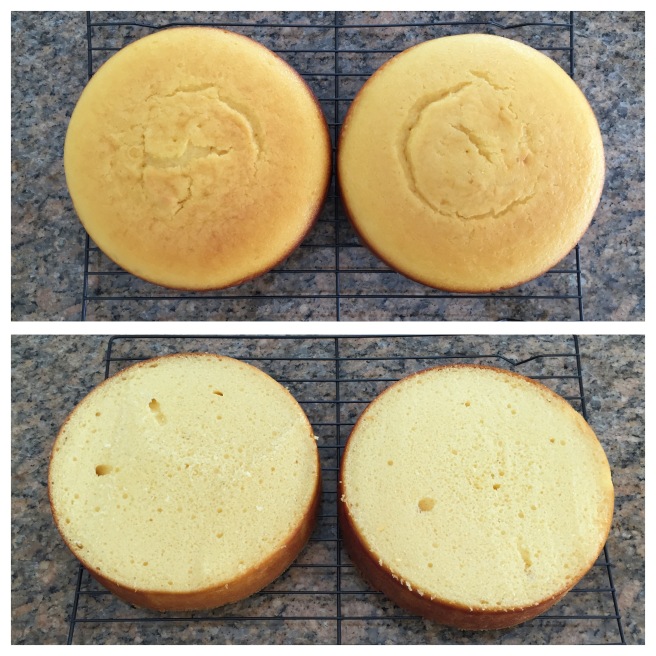
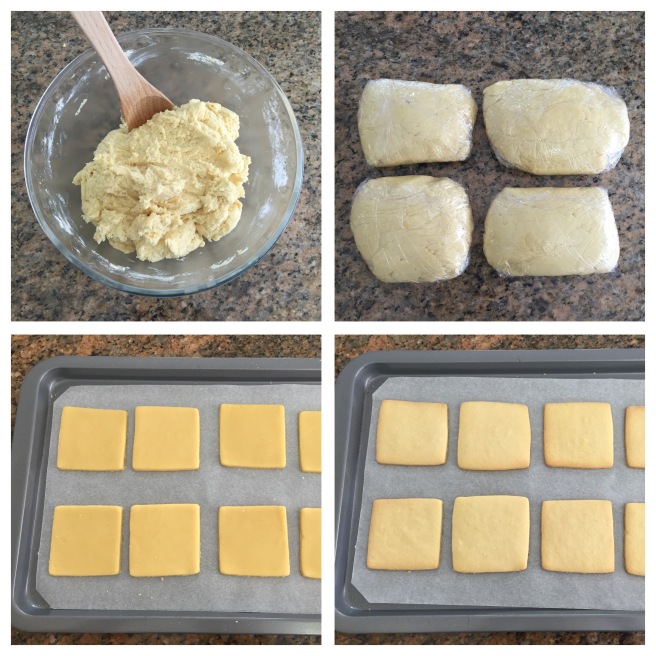
To recreate the style of cake I have made, I divided my batter into two 9 inch (or 20cm) round greased and lined cake tins. And this is what they looked like when they came out of the oven.

IMG_0089

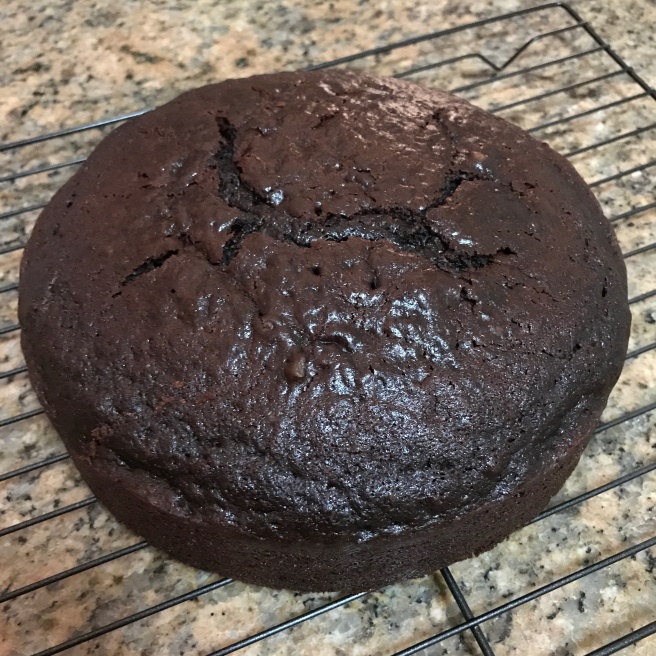
The cakes had a really nice fudgy top (which I did end up cutting off to level the cakes) but boy were those off-cuts a delicious sneaky treat for the baker. šŸ˜‰

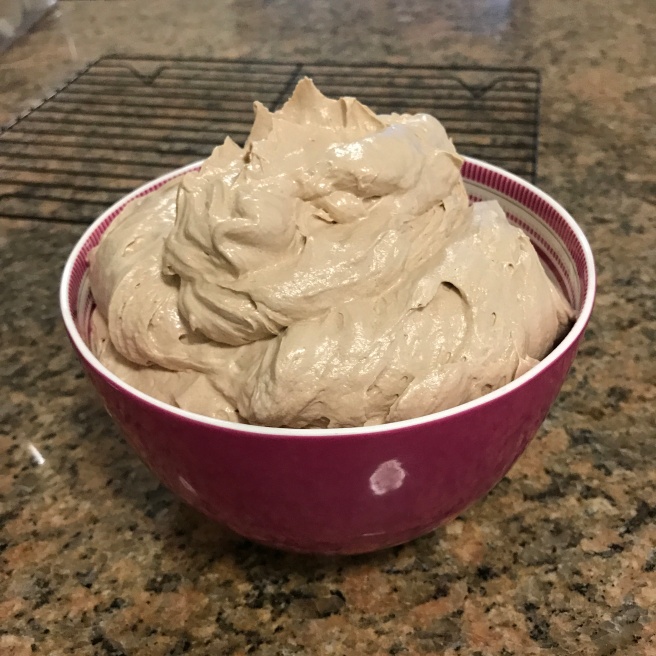
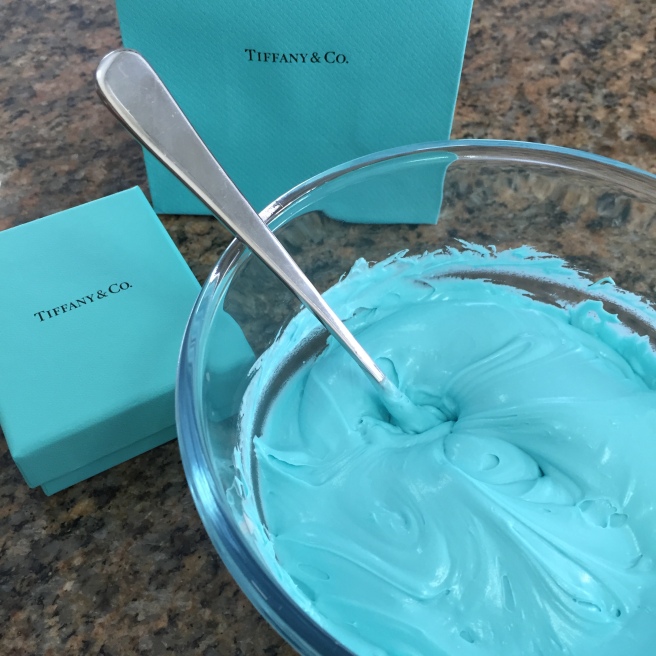
For the frosting I also tried a new recipe. It’s a delicious and simple Nutella Buttercream Frosting by Charlotte’s Lively Kitchen. This recipe turned out so well and I will definitely be keeping this one on hand for more baking in the future!

IMG_0067

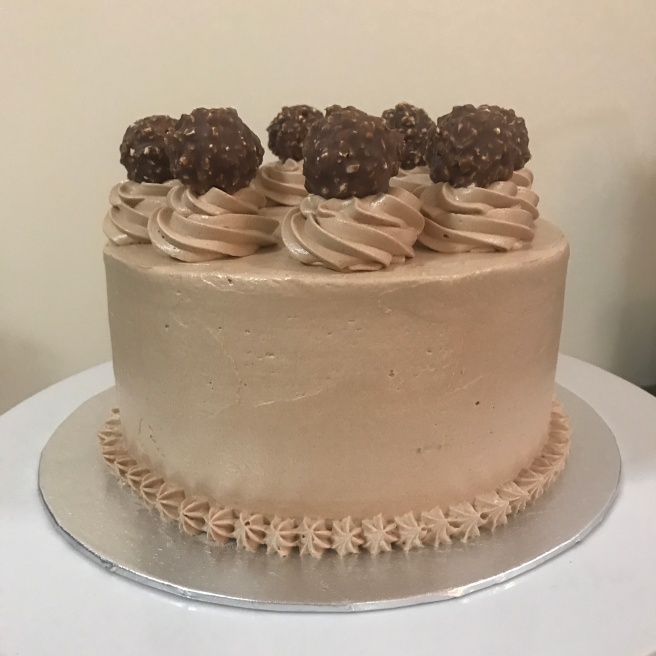
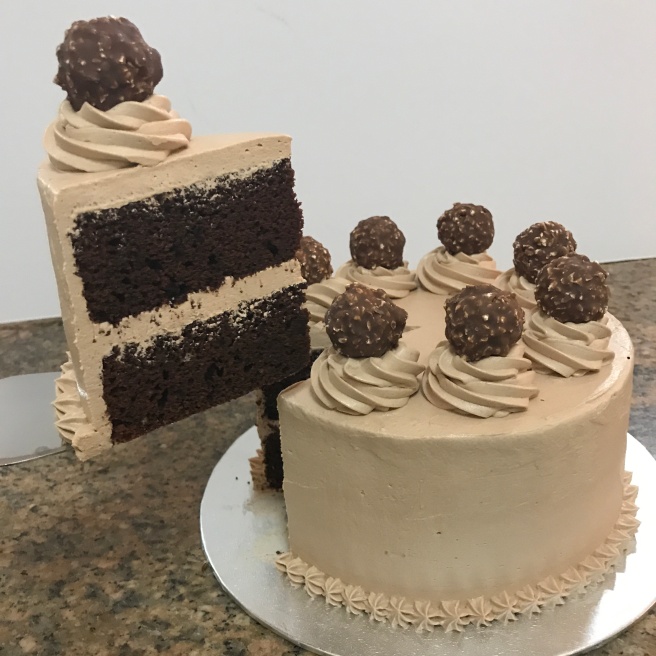
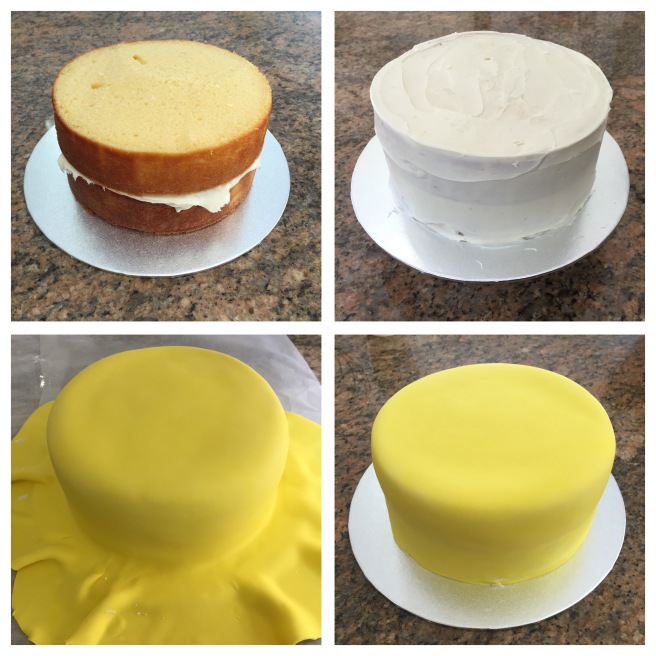
To assemble my cake I placed a small amount of frosting in the centre of a cake board and placed one of the levelled cakes bottom side down onto the board and pushed lightly to secure to the frosting. I then used an offset spatula to smooth a generous layer of frosting onto the top of the cake.

Next I placed the second levelled cake bottom side up onto the top of the other cake and again applied a generous layer of frosting to the top of the second cake as well as the sides of the entire cake.

I applied a lot more frosting to this layer (about 1cm thick) and then used a cake scraper to smooth the sides and top as I rotated the cake to give a nice even finish. This admittedly took a while to get nice and smooth to my satisfaction! šŸ™‚

IMG_0094IMG_0106

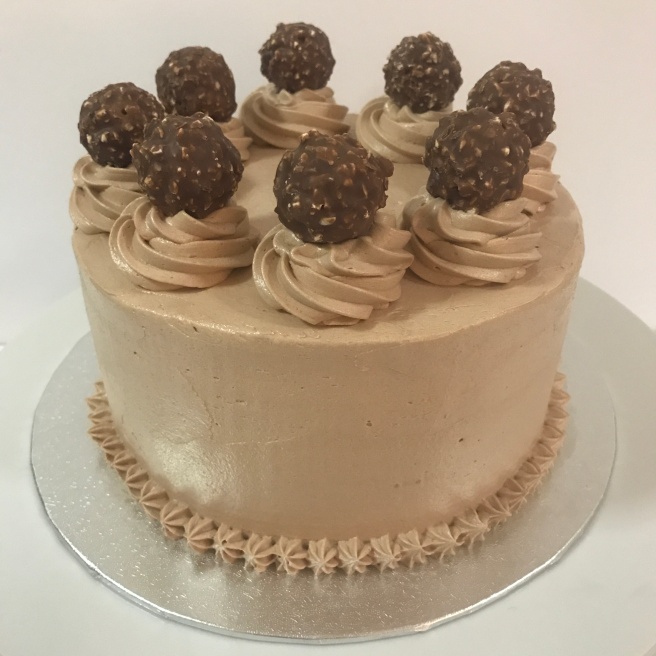
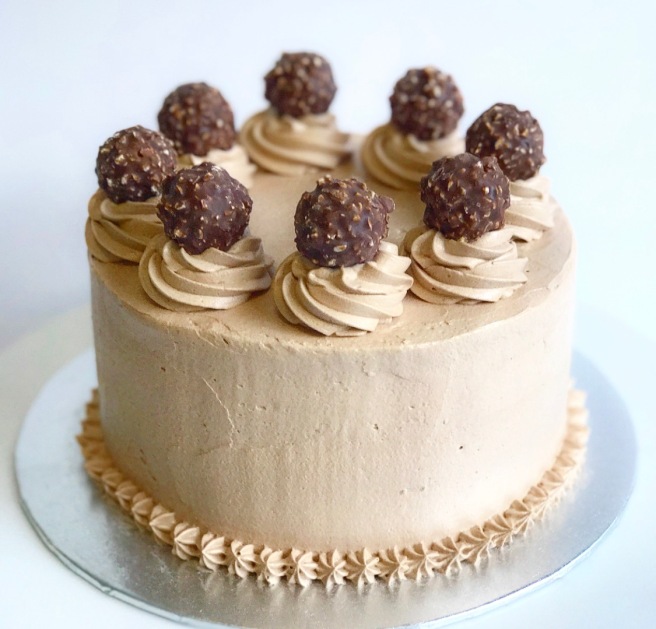
To decorate the base where the cake joins the board I used a piping bag with a small star tip attached and used the left over frosting to create little stars all the way around the cake.

For the swirls on top of the cake I used a larger star tip and piped eight round mounds evenly spaced around the outer edge of the cake and then placed a Ferrero Rocher on top of each.

IMG_0188

I ended up freezing this cake in individual slices and it tasted superb even after defrosting! (And warmed up slightly) šŸ™‚

I highly recommend trying both the cake and buttercream frosting recipes and you will certainly be popular with anyone who loves chocolate and Nutella!

To see more of my baking creations you can find me onĀ InstagramĀ andĀ Pinterest.

Happy baking! šŸ™‚


Hunger Games Cupcakes


IMG_4521

This week marks the premiere of Mockingjay Part 2, and as a Hunger Games fan I had to decorateĀ some cupcakes for the occasion (of course). šŸ™‚

A little explanation of the different types of decorations I made:

  • 2 x mockingjay pins
  • 1 x President Snow’s white rose with drops of blood
  • 2 x chocolate with sprinkles (to represent District 12)
  • 2 x nightlock berries
  • 2 x orange flames with an arrow (to represent the “Girl on Fire”)

_____________________________________________________

THE THINGS YOU WILL NEED TO GET DOWN AND NERDY

  • 1 x red velvet cupcakes packet mix
  • 1 x tub chocolate frosting
  • 2 x tubs vanilla buttercream frosting
  • yellow, black and green fondant
  • handful of blueberries
  • chocolate sprinkles
  • yellow and red food colouring

_____________________________________________________

LET’S DO THIS!

Prepare cupcake mix as per packet instructions.

Allow cooked cupcakes to cool completely before decorating.

While cupcakes are cooling, roll out fondantsĀ to around 3Ā mm in thickness.

Using a small leaf shaped cutter or by hand with a knife, cut out 7 leaf shapes.

Score long ways down the centreĀ of each and pinch one end into a point.

Allow to harden in an arc shape over a pencil.

To make an arrow, roll a small amount of black fondant into a very thin sausage and cut out an arrow head shape and stick to one end of the sausage with some water.

Allow to dry flat and harden.

To make the mockingjay symbol cut out two rings about 5mm wide using the yellow fondant and allow to dry flat and harden.

For the mockingjay bird shape, cut out a template using baking paper (I found one on the Internet) and carefully cut out the two bird shapes with a knife.

Using the back of a sharp knife score a few lines down the wing and tail of each bird for extra detail and allow to dry flat and harden.

Next cut out two thin arrows free hand with a knife and also allow to dry flat and harden.

Lastly cut out two filled in circles using the black fondant (the same diameter as the yellow rings) to be the background for the mockingjay shapes.

IMG_4500

_____________________________________________________

DECORATING TIME!

For the District 12 cupcakes, pipe the chocolate frosting onto two cupcakes using a medium to large star shaped piping nozzle andĀ top with chocolate sprinkles.

For the President Snow white rose and the nightlock berries cupcakes, pipe white buttercream frosting onto three cupcakes in a rose shape using a closed star piping nozzle.

Place a single green fondant leaf to the edge of one cupcake.

Place three leaves towards the centre of theĀ other two cupcakes, leaving space in the middle for the berries.

For the cupcake with one leaf, carefully place a few drops of red food colouring to the opposite side of the rose to where the leaf is positioned.

IMG_4537

For the other two cupcakes place three blueberries in the centre between the leaves.

IMG_4536

To make theĀ orange flame “Girl on Fire” cupcakes, dye one portion of buttercream frosting yellow, and another equal portion orange.

Place both colours together into a piping bag with a large star shaped piping nozzle, keeping the colours fairly separated in the piping bag.


Pipe the two-tone frosting onto two cupcakes using a star shaped piping nozzle and place the arrow at an angle in one of the cupcakes.

Lastly, to decorate the two mockingjay cupcakes apply a thin layer of chocolate frosting onto both cupcakes and smooth with a knife.

To assemble the mockingjays, place the yellow ring onto the black circle using some water to stick the two together.

Then carefully place the mockingjay shapeĀ into position over the top of the ring and finish byĀ placing the arrow across the bird at an angle.

Place the completed birds in the centre of each cupcake.

IMG_4535

These cupcakes required a bit of prep work for each of theĀ different decorations but were well worth the effort!

Which cupcake design is your favourite?

IMG_4510

IMG_4521

To see more cupcake creations you can find me on Instagram, Twitter, Facebook and Pinterest.

Happy Baking! šŸ™‚

AND MAY THE ODDS BE EVER IN YOUR FLAVOUR šŸ˜‰


Tuxedo Strawberries

tuxedo strawberries

The new James Bond film Spectre officially makes its Australian premiereĀ today so I thought I would dedicate thisĀ post to everyone’s favourite British spy.

Enter stage left, the TUXEDO STRAWBERRIES.


THE THINGS YOU WILL NEED

These little sweet treats only require two ingredients – chocolate and strawberries. Hooray! šŸ™‚

ingredients

I used whiteĀ and dark chocolate melts for this recipe asĀ I find the dark chocolate gives more contrast in colour against the white chocolate, but you can substitute milk chocolate instead if you like.


LETS DO THIS!

Wash strawberries and pat dryĀ with paper towel (make sure they are completely dry otherwise the melted chocolate wont stick to them).

Lay out a large sheet of baking paper on a flat surface to place the strawberries to dry once dipped in chocolate.

Place the white chocolate melts in a deep microwave safe mug and melt using aĀ microwave for 30 second intervals until chocolate is smooth with no lumps.

Holding a strawberry by the green leafy top, dip vertically into the melted chocolate, leaving about 5mm of red strawberry exposed at the top.

Allow excess chocolate to drip off and gently lay on baking paper to dry.

Repeat for all strawberries and allow to completely dry and harden, but do not put them in the fridge!

white choc strawberries

Place the dark chocolate melts inĀ a deep microwave safe bowl and melt in the microwave until smooth.

Hold a white chocolate strawberry by the green leafy top and dip into the dark chocolate on an angle and then dip again on an angle in the opposite direction to give a triangle shape.

Repeat for all the strawberries.

dark choc strawberries

Pour left over melted dark chocolate into a piping bag and cut a very small hole in the corner.

Pipe a little bow tie on the white part of each strawberry, leaving room underneath for the buttons.

Then pipe three vertical dots under each bow tie and your tuxedo strawberry is complete!

tux2

tux strawbs in patty pans

tuxedo strawberries

Be sure to check out my other social media sites for more of my sweet creations! You can find me on Instagram, Twitter, Facebook and Pinterest.

Happy Baking! šŸ™‚

Magic Malteser Cake

magic malteser cake

For today’s baking creation I wanted to make something less fiddly and intricate and something more sturdy that focused onĀ building and construction. So, I give you the two-tiered MAGIC MALTESER CAKE!

If I’m going to be perfectly honest, the hardest part about making this cake was resisting to eat the Maltesers before they went on the cake! šŸ˜‰

ingredients

chocolate fingers


PREPARING THE CAKES

  1. For the large base cake prepare 2 x Green’s Chocolate Cake mixes as per packet instructions.
  2. Combine both mixtures into a 26cm round cake tin and cook in a 160 degree Celsius gas oven for approximately 55-60 minutes.
  3. For the smaller cake prepare 1 x Green’s Chocolate Cake mix as per packet instructions and cook in a 19cm round tin for approximately 40-45 minutes.
  4. Allow cakes to completely coolĀ (I put mine in the fridge to cool quicker and harden slightly).
  5. Using a cake cutting wire, slice the round dome top off both cakes.

DECORATING TIME!

  1. Beginning with the large cake frost the top and sides with a thin layer of chocolate frosting.
  2. While the frosting is still sticky, start placing chocolate fingers vertically one at a time around the sides of the cake, making sure they are as close together as possible.
  3. Set aside and frost the smaller cake with a thin layer of frosting.
  4. Using cake dowel rods,Ā push vertically in the centre of the larger cake.
  5. Carefully place the frosted smaller cake on top of the centre of the larger cake.
  6. Once secure, start placing chocolate fingers vertically around the sides of the smaller cake too.
  7. At this stage I tied red ribbon around the middle of both cakes, but this part is optional if you don’t want to add ribbon.
  8. Once the ribbons areĀ tied and the bows are in line where youĀ want the front of the cake to be, startĀ adding Maltesers in the gap between the two cakes and to the top of the small cake, making sure to onlyĀ layerĀ themĀ as high as the chocolate fingers.
  9. Using a bamboo skewer or similar, push vertically into the smaller cake on a slight angle.
  10. Starting at the base of the smaller cake where the skewer is, carefully build up Maltesers one at a time around the skewer, securing each one in place with left over chocolate frosting (make sure the skewer is completely hidden by Maltesers, but leave about an inch of skewer exposed at the very top).
  11. Finally, takeĀ an empty Malteser packet and secure with tape over the top of the exposed part of the skewer, positioning it on an angleĀ so that the Maltesers look to be “falling” out of the packet.

steps

close up

top view

magic malteser cake

This cake was so much fun to make and is definitely a chocolate lover’s dream come true!

If you like this post and want to see more of my baking creations head over to my Instagram, Twitter, Facebook or Pinterest.

And if you want to share your own baking creations with me use the hashtag #chocolatecoveredcode so I can see them!

Happy baking! šŸ™‚

Poop Emoji Cupcakes

poop emoji cupcakes

Let’s face it. Chocolate frosting pipedĀ in a certain way can look a lot like… well, you know..

single

So what happens when you make chocolate cupcakes with chocolate buttercream frosting and a few fondant facial features?

POOP EMOJI CUPCAKES!

Today’s baking isĀ dedicated to one of the more popular and fun emojis used in social media. Enjoy šŸ™‚

poop cupcakes

To make the cupcakes I used 1 x Green’s Chocolate Cupcakes mix and prepared as per packet instructions.Ā For the poop I used 1 x tub of Betty Crocker’s Vanilla Buttercream Frosting and gradually mixed in cocoa powder until the desired colour was achieved.

To decorate I used a plain round large piping nozzle to pipe a pyramid swirl of chocolate buttercream frosting and for the emoji’s facial featuresĀ I cut out eyes and a mouth using a small amount of white and black fondant.

And just if you were wondering… they tasted amazing! šŸ˜‰

emojis

If you want to see more of my baking creations you can find me on Instagram, Twitter, Facebook or Pinterest.

Happy Baking! šŸ™‚

Tiffany Cupcakes

tiffany cupcakes

After recently purchasing some jewellery from my favourite store Tiffany&Co, I was inspired to make some cupcakes dedicated to the iconic Tiffany blue colour.

To make the cupcakes I used 1 x Green’s Vanilla Cupcakes mix and prepared as per packet instructions. I replaced the patty pans that came in the packet with silver patty pans that I bought separately.

cupcakes

To make the unmistakable Tiffany blue coloured frosting,Ā I used 1 tub of Betty Crocker’s Vanilla Buttercream Frosting andĀ coloured it using Queen’s Blue liquid food colouring.

I added a few drops of food colouring at a time, stirring in thoroughly before adding more.Ā I had a Tiffany box on hand to compare the colour to ensure I matched it as close as possible.

frosting

To decorate I used an extra large star shaped piping nozzle to pipe the frosting onto the cupcakes and for an extra touch I sprinkled a few silver cachous on each cupcake.

single cupcake

cupcakes

If you would like to see more of my baking creations you can follow me on Instagram, Twitter,Ā FacebookĀ or Pinterest.

Happy Baking! šŸ™‚

Creepy Crawly Cupcakes

creepy cupcakes

It’s Halloween time again and what better way to get my spook on than to make some Creepy Crawly Cupcakes.

I’ll admit the most time consuming part of baking these little beauties was cutting the bats and spiders out of fondant!

prep

To make the cupcakes I used 1 box of Green’s Vanilla Cupcakes mix and prepared as per packet instructions. This recipe made 18 small cupcakes for me.

To make the orange icing I used 1 tub of Better Crocker’s Vanilla Buttercream Frosting and dyed it orange using a combination ofĀ red and yellow food colouring. I just experimented with the colours to get the orange colour that I wanted.

Note – I used a lot more yellow than red to get the orange colour shown in the pictures.

mixing

To frost the cupcakesĀ I used a large star tip piping nozzle and a disposable piping bag. (IĀ allowed the frosting to re-harden slightly in the fridge first after it became considerablyĀ runnyĀ afterĀ mixing in the food colouring).

To make the spiders and batsĀ I found stencilsĀ of each from the Internet and cut the shapes out ofĀ baking paper. Using these as a guide I used a sharp knife to cut out 9 bats and 9 spiders from rolled out pre-coloured black fondant. This took quite some time but the results were worth it!

To finish off decorating I placed a fondantĀ creepy crawly onto each cupcake.

finished

circle

close up

Happy Halloween! šŸ™‚

Pink Ribbon Cupcakes

pink ribbon cupcakes

Today isĀ Pink Ribbon Day –Ā a day to raise awareness and funds toĀ support many women who are affected by breast and gynecological cancers.

To help raise money for this cause I made some cute vanilla cupcakes with buttercream frosting and pink fondant ribbons.

cupcakes

To make the vanilla cupcakes I used a White Wings Vanilla Cupcake packet mix which made 22 small cupcakes if prepared as per packet instructions.

For the frosting I used 1 tub of Betty Crocker’s Vanilla Buttercream Frosting and piped onto the cupcakes using a disposable piping bag and a star shaped piping nozzle.

prep

pink ribbons


HOW TO MAKE PINK FONDANT RIBBONS

  1. Dye a small amount of white fondant with Rose Pink food colouring until the desired pink colour is achieved
  2. Roll fondant out using a rolling pin to about 3mm in thickness
  3. Cut 20cm x 1cm strips of fondant using a ruler and a sharp knife
  4. Taking one fondant strip and holding at both ends, cross one end over the other so that about 1cm of each end extends past the join
  5. Secure join with a small amount of sugar glue or egg white, making sure to not flatten the loop
  6. Ā Repeat for all strips and allow fondant to harden
  7. To add an extra touch, glue a silver cachou to each join of the ribbons
  8. Once cupcakes have been frosted carefully place a ribbon onto each cupcakes pressing slightly into frosting to secure

top view

If you would like to help raise funds for Pink Ribbon Day by baking some goodies or simply make a donation you can find all the details on the Pink Ribbon Website.

Happy Baking! šŸ™‚

Batman Cake

cake

Der ner ner ner ner ner ner ner BAT CAKE! Today is Batman DayĀ so of course I had to make a cake in Batman’s honour.

Batman has been my favourite superhero since I was a little girl. My mum even made me a Batman cake for my 4th birthday!

To make this cake I used two basic yellowĀ cakes stacked on top of each other and used coloured fondant for the decorations.


THE THINGS YOU WILL NEED TO GET DOWN AND NERDY

  • 2Ā Green’s Vanilla Cake packets
  • 4 eggs
  • 6 tbs margarine or butter
  • 1 1/3 cups milk
  • Buttercream frosting
  • Black and yellow fondant

prep

LET’S GET BAKING!

  1. Prepare one cake mix as per packet instructions
  2. Pour cake batter into a lined and greased round baking tin (mine is 18cm in diameter)
  3. Cook cake in 160oC gas oven for about 50 minutes (oven temperature and cooking time may vary depending on your type of oven)
  4. Repeat steps 1-3 for the second cake mix
  5. Once both cakes are completely cooled, cut the top off each cake using a sharp knife

plaincake


DECORATING TIME!

  1. Spread a layer of buttercream frosting all over the top of one cake
  2. Carefully place the other cake directly on top of the frosted cake
  3. Then spread a thin layer of buttercream frosting all over the entire cake
  4. Place cake in the fridge for about 10 minutes until the frosting sets slightly
  5. Meanwhile, roll out your yellow fondant until it is about 3mmĀ thick and is large enough to cover the entire cake
  6. Take your cake out of the fridge and carefully place yellow fondant on the cake and smooth out to the base of the cake
  7. Cut the excess fondant away from cake with a sharp knife (don’t throw the excess away, you will need this to make little squares for the lights on the buildings)

fondant

For Batman and the city skyline:

  1. Roll out your black fondant until it is about 3mm thick
  2. Using a sharp knife, cut out a batman shape (I used a template I found on Google) and a city skyline to go around the base of the cake
  3. To secure your fondant pieces use a paint brush to dab a tiny amount of egg white to the back of each piece

batman

And then… Batman Cake = COMPLETED! *high five*

cake


If you like my creations you can also follow me on Twitter, FacebookĀ or InstagramĀ for more geeky goodies!

HAPPY BATMAN DAY! šŸ™‚

Social Media App-etizers

appetizers

This week I decided to make cookies in the shape of a few popular smart phone app icons. I kept with a simple colour scheme and decorated with three blue apps – Facebook, LinkedIn and Twitter.

To make the cookies I used Donna Hay’s Star Cookies RecipeĀ and to make the fondant I used MyCupcakeAddiction’s Marshmallow Fondant Recipe.

cookies


THE THINGS YOU WILL NEED TO GET DOWN AND NERDY

  • 250g butter
  • 3/4 cup caster sugar
  • 2 tsp vanilla extract
  • 1 egg yolk
  • 2 1/4 cups plain flour
  • Blue food colouring
  • Square cookie cutter
  • 1 packet Royal Icing mix
  • Piping bags and nozzles

ingredients

INSTRUCTIONS

  1. Prepare cookie dough mixture as per Donna Hay recipe
  2. Divide into 4 sections and wrap individually and place in fridge to harden
  3. Roll out cookie dough to about 1/2 cm thick
  4. Using the cookie cutter, cut squares in the dough and place on a lined baking tray ( if you don’t have a square cookie cutter you can just use a sharpĀ knife and a ruler)
  5. Using your finger, gently round the corners of each square to look more like an app icon shape
  6. Bake in 160oC gas oven for about 8-10 minutes until edges start to turn brown (your temperature and cooking time may vary depending on your oven)
  7. Allow to cool completely before decorating


prep

TO DECORATE

  1. Prepare the Royal Icing as per packet instructions
  2. Divide mixture between two bowls
  3. Place a few drops of blue food colouring in one bowl until you have a colour similar to the Twitter background
  4. Place a few more drops of blue food colouring into the other bowl until you have a darker blue similar to that of the Facebook and LinkedIn backgrounds
  5. Spoon each mixture into a separate piping bag
  6. To decorate, outline a cookie with a singleĀ square lineĀ of icing and then fill in the centre making sure there are no gaps
  7. Repeat for all cookies, but remember, you will need more dark blue cookies than light blue cookies!

twitterfb

blue cookies

THE THINGS YOU WILL NEED FOR MARSHMALLOWĀ FONDANT (as per MyCupcakeAddiction recipe)

  • Marshmallows
  • Icing Sugar Mixture
  • Copha (Vegetable Shortening)
  • Water

LET’S DO THIS!

  1. Using only the white marshmallows, place in a bowl with 3 tsp water
  2. Microwave for 30 seconds at a time, stirring in between, until the marshmallows are melted and smooth
  3. Stir inĀ icing sugar graduallyĀ until a dough forms
  4. Spread a layer of softened Copha over your workbench as well as over your hands to prevent dough from sticking
  5. Knead dough onto workbench and keep adding small amounts of icing sugar until desired fondant consistency
  6. Using a rolling pin, roll out fondant until about 1/4 cm thick
  7. Using a knife, cut out enough shapes for each app – you will need lowercase letters f,Ā i and n, as well as some twitter birds. (I cut out the letters free hand with a sharp knife, and used a stencil of a Twitter bird I found on Google)

icing

Carefully place the Twitter birds on the light blue cookies and the letters on the dark blue cookies, securing each shape with a tiny amount of left over Royal Icing.

finished

Then you can have fun arranging your cookies however you like!

square

mess
circle

If you make these Social Media App-etizers I’d love to see your pics!

You can find me onĀ Twitter, FacebookĀ or Instagram.

Happy baking! šŸ™‚